How to Make Your Own Rolling Papers
So you want to make your own rolling papers. Honestly, it's not as strange an idea as it first sounds. Whether you're doing it out of curiosity, you've run out at a bad time, or you genuinely want to know what goes into them, there's a real process here that actually works.
Fair warning though: this isn't a five-minute project. Getting usable results takes the right materials, a bit of patience, and a few practice attempts. The first couple you make probably won't burn cleanly or hold together well. That's normal. The technique clicks once you've felt what the paper needs to do.
Why Bother Making Them From Scratch?
Most people who try this fall into a few categories. There's the genuinely curious crowd who just wants to know if it can be done. There are the control-minded folks who want to know exactly what's in their papers — no bleach, no additives, no mystery coatings. And then there's whoever is reading this at 11 PM who just ran out and doesn't want to make a store run.
All valid reasons. The appeal of DIY papers is mostly about what you leave out. Commercial papers often contain calcium carbonate to slow burns, potassium nitrate as a burn accelerant, and various binders and bleaching agents. Some brands are better than others, but if you're making your own, you start clean and choose every ingredient.
There's also a craft element to it. Plenty of people who roll their own enjoy knowing they made the whole thing — from the paper outward. It's not for everyone, but if that kind of hands-on process appeals to you, this guide covers everything you need.
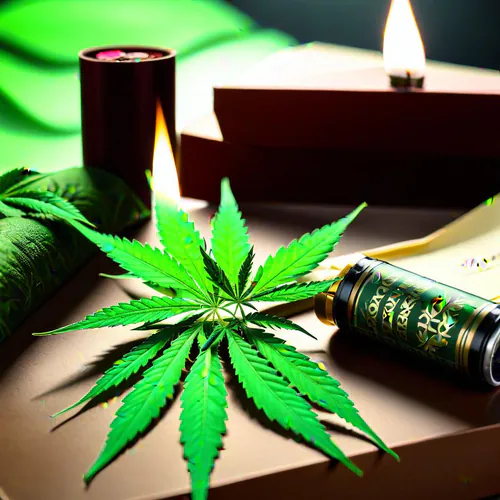
What Paper Actually Works
The material you choose determines everything — how well it rolls, how evenly it burns, what it tastes like. This is where most DIY attempts go sideways.
The three materials worth using are rice paper, hemp paper, and flax paper. Each has different characteristics worth knowing before you pick one.
Rice paper is the most common base for commercial rolling papers. It's very thin, nearly transparent, and burns slowly and cleanly. The thinness is a double-edged thing — it produces minimal ash and doesn't interfere much with taste, but it's more fragile to work with, especially if it gets even slightly damp. Craft stores and online suppliers carry unbleached rice paper in sheets that work well for this.
Hemp paper has a bit more body and texture. It's slightly thicker than rice paper, which makes it easier to handle but means it burns a little differently. Some people think it has a faint earthy or sweet quality, though that's subtle. Hemp paper is a natural fit if you're already using hemp products and want to keep the whole setup consistent. It's also widely available in natural/unbleached form.
Flax paper is the least commonly used of the three but has a following among people who want the thinnest, cleanest-burning option. Flax fibers make an exceptionally thin sheet that's more durable than it looks. It's harder to find at a local craft store but available from specialty paper suppliers online.
One practical note: thickness affects how you roll. Thin papers like rice and flax demand clean, dry hands and confident rolling — any hesitation and the paper tears or wrinkles. Hemp paper is more forgiving when you're still learning.
Don't Use These
Printer paper, newspaper, tissue paper, pages from books or magazines — none of these are safe. They contain inks, optical brighteners, bleach compounds, and other chemicals that combust into toxic fumes. The fact that paper looks plain doesn't mean it's clean to burn. Aluminum foil and wax paper are also off the table. Receipt paper is worth a special mention: it's typically coated in BPA or BPS, both of which are harmful when heated. Stick with food-grade or craft-grade rice, hemp, or flax paper only.
Cutting and Sizing the Paper
Standard rolling papers are roughly 3 inches long by 1.5 inches wide (about 70mm × 36mm). That's a good starting size for most people. If you prefer larger joints, cut them a bit longer. The 1.5 inch width is fairly standard regardless of length, since that's about how much paper you need to wrap around the herb and still leave an edge to seal.
Use a ruler and a sharp craft knife or scissors. Dull scissors drag and compress the edge, which makes the paper harder to work with later. If you're using a craft knife, cut against a metal ruler on a cutting mat — the straight edge matters more than you'd think. Jagged or uneven edges make rolling and sealing noticeably harder.
After cutting, lay the paper flat and smooth out any wrinkles or creases. You can run a finger or a flat object across it. The goal is a flat, uniform sheet without any folds that would create an uneven burn. Even a small crease running lengthwise can cause one side of the finished joint to burn faster than the other.
If you're making several papers at once, stack them and cut multiple sheets at the same time. This is faster and produces more consistent sizing across your batch.
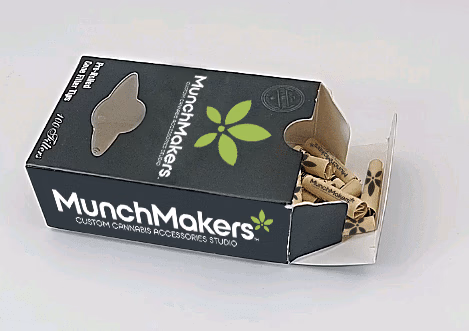
Making Filter Tips
A filter tip isn't strictly required, but it makes everything easier. It gives you something firm to hold, keeps herb from getting pulled into your mouth, and acts as a form that you roll the paper around — which is genuinely helpful when you're learning.
You can buy pre-cut filter tips from any smoke shop, or make them from a small piece of thin cardstock (a business card works). Cut a strip about half an inch wide and an inch long. Fold one end into an accordion-style W shape two or three times, then wrap the remaining cardstock around the outside of the folded part. That's it. The accordion section lets air pass through; the wrapped outer portion holds the shape.
The tip should fit snugly at one end of your paper. If it's too loose, it'll fall out. If it's so tight it's hard to insert, trim it slightly. Getting this right is worth the few extra seconds — a well-fitted tip makes the whole rolling process significantly easier.
Adding Flavor (Optional)
This step is optional and easy to overdo, so proceed carefully. If you want to add flavor, use food-grade essential oils or extracts — vanilla, cherry, mint, citrus, whatever you like. The "food-grade" part matters. Many essential oils sold for aromatherapy or skincare contain carrier oils, additives, or concentrations that aren't meant to be inhaled.
Use a very small amount. One drop diluted in a tablespoon of water, used to lightly brush across the surface of several sheets, is usually plenty. Too much and the paper takes on a chemical edge that overpowers everything else. Too much liquid and the paper becomes fragile and hard to work with.
Fruit-based flavors tend to work well since they're light and don't linger. Heavy floral or spice-based flavors can be overwhelming. If you're new to this, start with something mild like vanilla or citrus and see how you like it before experimenting further.
Some people skip the oils entirely and instead use flavored honey as the adhesive strip (more on sealing below). That approach adds a subtle sweetness without needing to treat the whole paper.
Rolling the Paper
Set your filter tip at one end of the paper. Place your ground herb in a line down the center of the paper, distributing it as evenly as you can from the filter tip to the far end. The distribution really does matter — any thick or thin spots will show up as uneven burns later.
Pick up the paper and start working it back and forth between your thumbs and forefingers. You're not rolling it yet — you're shaping it. The idea is to compress the herb into a cylinder and get the paper to conform around that cylinder before you actually commit to rolling. This pre-rolling step is something a lot of beginners skip, and it's usually why their joints come out lumpy or too loose.
Once the herb feels packed and cylindrical between your fingers, tuck the edge closest to you (the bottom edge) under the herb. Then roll upward, keeping tension on the paper so it stays tight against the herb as you go. Roll until only a thin strip at the top edge is sticking up.
Lick that edge and press it down to seal. Or, if you're using honey or another adhesive, apply it to that strip before you finish rolling.
How tight should it be? Tight enough that it doesn't sag or feel floppy, but not so tight that airflow is restricted. A joint that draws like breathing through a coffee stirrer is too dense. You should be able to inhale through it fairly easily before lighting.
Sealing Without an Adhesive Strip
Commercial papers have a gummed strip — that thin line of dried adhesive along one edge. DIY papers don't, which is the main practical challenge.
The simplest solution is honey. A tiny amount applied to the edge with a fingertip or a small brush works extremely well. It seals reliably, burns cleanly, and adds a faint sweetness. Don't use too much — a thin coating is enough. A thick glob of honey makes the edge sticky and slow to dry.
Saliva works too, if you've left enough overlap. The paper needs to overlap by about a quarter inch for saliva alone to hold it. Less than that and it'll peel back once it dries. Press the edge firmly against the paper beneath it and hold it for several seconds while it bonds.
A flour-and-water paste is another option — just mix a small pinch of flour into a few drops of water until it's a thin paste, apply to the sealing edge, and let it dry before rolling. It burns neutrally and holds well. The only downside is that it adds a step and requires the paste to dry before you smoke.
Whatever you use, seal the edge all the way from the filter tip to the open end without gaps. Any unsealed section will unravel or cause an uneven burn that runs along that side.
Let It Dry Before You Light It
If you used any moisture — honey, saliva, paste, flavored liquid — let the paper dry before smoking it. Even if it looks fine, a damp rolling paper burns unevenly and often tastes noticeably off. The moisture turns to steam and interferes with the draw.
Thirty minutes is a reasonable minimum. An hour is better. If you've brushed on any kind of flavoring or liquid adhesive and want to be sure, set it aside for a few hours or overnight. There's no downside to waiting.
You can speed up drying slightly by setting the finished joint somewhere with airflow — not in direct sunlight or near heat, which can make thin paper brittle. Just on a table in a dry room works fine.
Common Problems and How to Fix Them
A few issues come up consistently when people first try this. Most have straightforward fixes once you know what you're looking for.
Burning unevenly is almost always a distribution problem. If the herb isn't packed at a consistent density from one end to the other, the sparse sections burn faster. When you're loading the paper, spread the herb deliberately and then feel it with your fingers before rolling — any lumpy or thin sections should be obvious.
Canoeing, where one side burns faster and the paper starts running ahead on that side, usually means the joint was rolled tighter on one side than the other, or that it was lit unevenly. If it starts to canoe, wet your finger and dab it on the leading edge to slow that side down while the other catches up. Relighting the slower-burning side also helps.
A joint that falls apart mid-smoke means either the seal didn't hold or it wasn't rolled tightly enough. With DIY papers, the seal is usually the culprit. If your honey or paste isn't sticking, try cleaning your hands, reapplying the adhesive, and pressing the edge down for a full ten seconds. The contact time matters.
Paper tearing while you roll usually means one of two things: the paper is too wet, or you're applying pressure unevenly. Rice paper especially will tear if your hands have any moisture on them. Keep a dry cloth nearby and make sure your hands are completely dry before you start. Apply even pressure with both hands rather than pressing harder on one side.
A joint that draws too hard means it's packed too tightly. There's no fix for this after the fact — you'll need to unroll it and redistribute the herb. When loading, keep in mind that the herb will compress further during rolling, so start a little looser than you think you need.
Things That Help When You're Learning
Keeping your hands dry makes a bigger difference than most people expect. Wet or sticky fingers compromise both the paper and your grip. Keep a dry cloth nearby and wipe your hands before you start and between attempts.
Don't overstuff the paper. It feels counterintuitive, but less herb is easier to work with while you're still learning. Once you're rolling consistently well, you can start packing more tightly. Early on, a lightly loaded paper is much easier to roll into something functional.
Practice the rolling motion without any herb first. Just take a scrap piece of the same paper and practice the tuck-and-roll until it feels natural. The movement should be smooth and continuous, not tentative. You'll develop a feel for how much pressure the paper can handle without tearing.
Have more paper cut and ready than you think you'll need. Your first few will probably not come out right — that's expected, not a failure. Give yourself room to practice without rationing your materials.
A Few Alternatives Worth Knowing
If making papers from scratch sounds like more work than you want to take on, there are some alternatives that people actually use.
Rose petals can work if they're dried properly. Lay fresh petals on parchment and put them in a low oven (around 200°F) for a few minutes, just until they're dry and pliable but not brittle. They burn slowly and smell good, though they're finicky to roll since they don't have the same flat, consistent surface that paper does.
Corn husks are more practical than they sound. The same husks used in tamale-making work reasonably well once they're dried out. Soak them to make them pliable, shape them, then let them dry into the shape you want. They're natural, they burn cleanly, and they have more structural integrity than rose petals.
Pre-rolled cones are the obvious shortcut. You just fill them, tap them down, and fold the tip closed. No rolling skill required. If you're regularly making joints and this whole DIY process doesn't appeal to you as a regular habit, cones are the practical choice.
An apple pipe is worth mentioning for the times you have herb but literally nothing else. Push a pen through the top to make a bowl, poke a second hole through the side at an angle to meet the first, and you have a functional pipe. It works and the apple adds a faint flavor that's actually pleasant. Not elegant, but it gets the job done.
Safety and Legal Stuff
Only use natural, unbleached paper with no additives. If you wouldn't eat or drink it, don't put it in something you're going to smoke. That rule covers most of the safety ground: it rules out inks, dyes, synthetic coatings, plastics, and anything chemically treated.
Cannabis laws vary depending on where you are, and it's worth knowing the rules in your location before any of this. This guide describes a technique; whether and how you use it is on you.
If You'd Rather Skip the Process
Making papers from scratch is satisfying once you've figured it out. But it's not the only way to get exactly what you want. If you're more interested in customization than in the DIY process itself, our custom rolling papers let you put your brand, design, or artwork on professionally manufactured papers — which will roll, burn, and seal better than anything you'd make at home.
And if you're building out a full setup, it's worth looking at custom lighters, ashtrays, and rolling trays while you're at it.